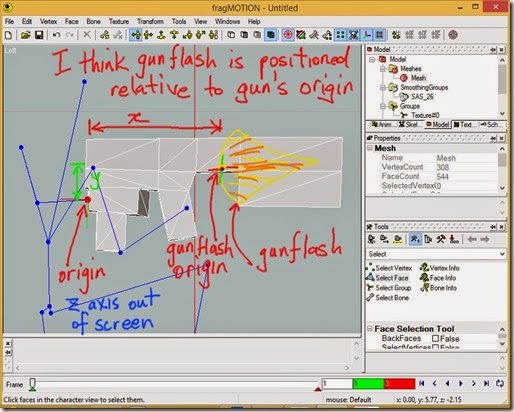
Usually you can guess that the mesh the gunflash is linked to is the gun mesh.
That is, the gunflash is positioned x, y, z units from the origin of the gun mesh.

You can use fragMOTION to be sure which mesh the gunflash is linked to by changing the rotation of the mesh and seeing if the gunflash position rotates too and stays in the correct position relative to that mesh.
It is quicker to check using a *.TR4 file rather than a *.wad so I will use TurboPascal’s Fexanim to export and import the animations.
My TRLE folder is on my C: drive so on Windows 8.1 I need to run Fexanim with administrator rights which is done by right clicking on Fexanim and choosing “Run as administrator” and then confirming the popup dialog. I need administrator rights to save the *.TR4 file.
In this example I will study the SAS object in the "city.TR4" level included with TRLE.
Open "city.TR4" in Fexanim, select SAS in the object list and then choose a shooting animation from the Animations dropdown list.
I will export animation number 26 which is the SAS shooting while kneeling. I chose this animation because it is easier to get the SAS into this shooting animation in game.

Go to File>”Export to MS3d” and export the animation.

Open the animation in fragMOTION and in the Animations tab, click on “Animation” to select the animation.
Since I am only interested in the animation I did not bother texturing the object.

In the Skeleton tab click on each bone until you find out which bone is the gun mesh.
In fragMOTION the bones are the the blue dots in the 3D view, not the lines joining the blue dots.
When you click on a bone in the Skeleton tab the bone is highlighted in red in the 3D view and the child bones of the selected bone are highlighted green.
Selecting a bone also displays the coordinate system axes (XYZ) for that bone.
Now we know which bone is the gun mesh bone we can change its rotation for the whole animation to see if the gunflash will be rotated with it.
The gun mesh is Bone#7 so click on Bone#7 to select that bone, select “Skeletal Animation” in the tools panel dropdown to see the skeletal animation tools and click on “Rotate Key” in the tool list.

I have changed to a left side view of the object because I want to rotate the gun mesh so it points upwards.
Make sure the “Frame” slider which is at the bottom of the window is positioned at the first frame and then click and drag on the 3D view to rotate the gun mesh into an upright position.

We could now advance to the next frames in turn and rotate the gun mesh to vertical again but I will edit the rotation values more precisely using the Keyframe Editor.
In the main menu click Windows>”Keyframe Editor” to open the Keyframe Editor.
The Keyframe Editor lists, for every keyframe of the animation, the translation, rotation and scale keys for every bone in the skeleton.
A frame of an animation is a keyframe if there is at least one key set for that frame.

You will notice that there are no scale keys. You cannot change the size of the meshes in a TRLE animation. Fexanim should ignore scale keys on import if you do set any.
In TRLE every mesh must have a rotation key set in every keyframe. Fexanim should create a rotation key on import for every mesh in every frame if you do not.
In TRLE Mesh#0 (which will be Bone#0 in fragMOTION) is the only mesh that can have translation keys.
In TRLE Mesh #0 must have a translation key set in every keyframe. Fexanim should create a translation key for Mesh#0 in every keyframe if you do not.
The animation we exported has translation keys set for meshes other than Mesh#0.
If you examine the translation key value for a keyframe by double clicking on the yellow dot you will see that the translation keys for all meshes except Mesh#0 are zero.
Fexanim has created translation keys for meshes other than Mesh#0 because they are needed for the *.ms3d file format and if you do set translation keys for these meshes Fexanim should ignore them when you import the animation.
Double click on RotateKeyList under Bone#7 to select all the rotation keys for Bone#7 (the dots change colour to blue) and double click on the first blue dot to open the “Edit Key Values” dialog for the first rotation key.

Use the buttons I have circled in the “Edit Key Values” dialog shown in the screenshot above to go to the next or previous selected key in the row.
The key values for the next two frames are shown in the screenshot below.

Make sure you have the key values for frame 1 displayed in the “Edit Key Values” dialog and click the “Set All” button. This will copy the first frame’s key values to every keyframe.
Click “OK” in the “Edit Key Values” dialog to apply the changes and then close the Keyframe Editor to return to fragMOTION’s main screen.
Play the animation by using the play control or step frame controls or by dragging the frame slider and check that the animation looks okay.

Export the animation to an *.ms3d file by clicking File>Export and selecting MilkShape3D Files as the file type in the “Save as Type” dropdown list.
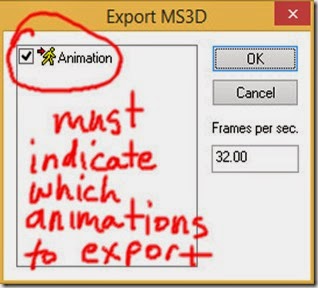
Make sure “Animation” is checked/ticked in the “Export MS3D” dialog and click “OK”. I leave the “Frames per sec.” at the default value. I have not tested if Fexanim uses this value on import.

Since I wish to replace animation number 26 for the SAS in the "city.TR4" level I make sure that the SAS is selected in Fexanim and animation number 26 is selected before I import the modified *.ms3d file using File>”Import from MS3d”.

Because I didn’t change the number of frames and want the SAS to have the same behaviour as before I leave the values in “Animation Parameters” set to the values for the original animation 26.
Save the *.TR4 file. I use the same name so I can play the level without changing the script.
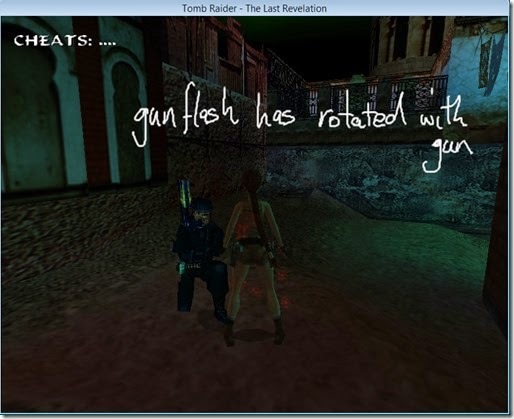
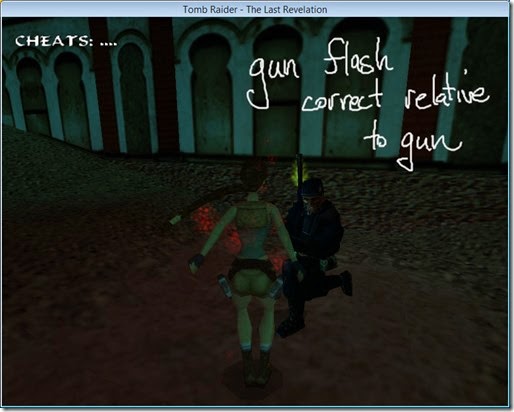
From the in game screenshots below you can see that the gunflash position has rotated with the gun.


Sometimes there is different mesh that provides the direction for shooting.
If I remember correctly, for ggctuk’s Centaur mod object [link] the direction the missiles were fired was controlled by an axis direction of the left hand mesh and not the shooting arm mesh.
prev | next
No comments:
Post a Comment