<Edit 17Sep14>
TurboPascal has updated Fexanim to include the material information in the *.ms3d file so the texture will now be assigned automatically when the *.ms3d is opened in fragMOTION.
TurboPascal also fixed the bugs that caused the UV map errors and the joining of the vertices in the upper leg meshes.
http://www.dxtre3d.com/temp/fexanim.rar
</Edit>
Open the model in fragMOTION and click the Texture pane tab.
Right click in the Texture pane and click New>Texture from the context menu.
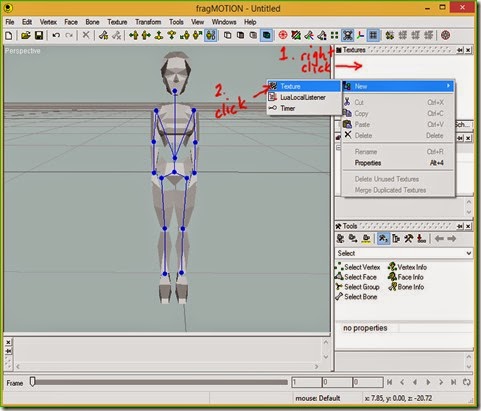
This creates an empty texture in the Texture pane.
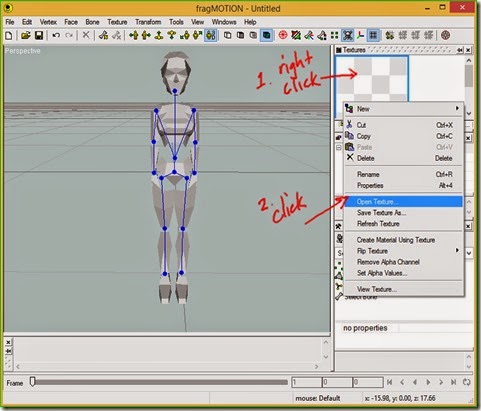
Right click on the empty texture, click Open Texture from the context menu and open the texture exported with the *.ms3d file.
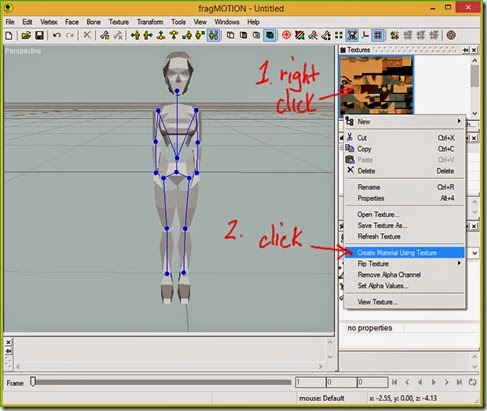
Right click on the loaded texture and click Create Material Using Texture in the context menu.
Select all the faces in the model by pressing CTRL+A.
In the Model pane right click on the material we created which is named Texture and click Assign To Selection in the context menu.

The model is now textured.
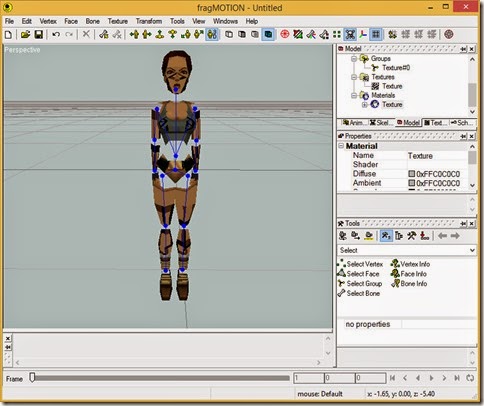
The UV coordinates need to be corrected so click Texture>UV Mapper in the main menu to open the UV Mapper and then select the texture from the dropdown.

The UVs are correctly scaled and seem to match the image but if you zoom in you will see where the problems are.
Firstly, some small UVs are not positioned correctly over the image and need moving.
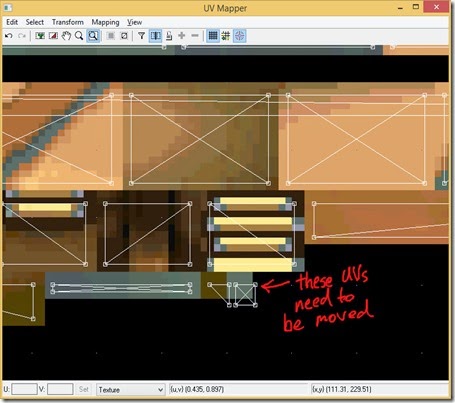
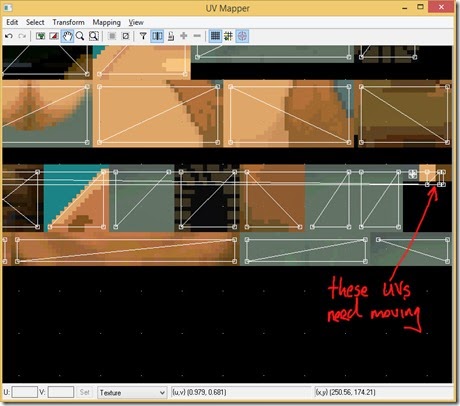
Click the Select UV Triangles tool button and then either click or box select the UV triangles to be moved.
Click and drag on a selected UV triangle and move it into the correct position.


After moving the other misplaced UV triangles the texturing is still not correct.

Open the UV Mapper again and select the texture to display the image.
Zoom in on the area shown in the second screenshot showing the UVs to be moved.
Select the UV triangle as shown below and then click the Zoom Selection Extents toolbutton.

The UV triangle is stretched across the whole width of the image when it should be confined to the tiny brown coloured texture piece.

Click and drag the middle left edge, square, green handle to move the UV point at the left edge of the image back to the right edge of the image and scale and move the UV triangle so that it is inside the brown texture piece.

There is a second UV triangle stretched across the image so scale and move it into position onto the brown texture piece below the UV triangle we just corrected.

The model is now correctly textured. Notice that we don’t have the lighting problem that we had with the model exported from Daro Anim Maker.
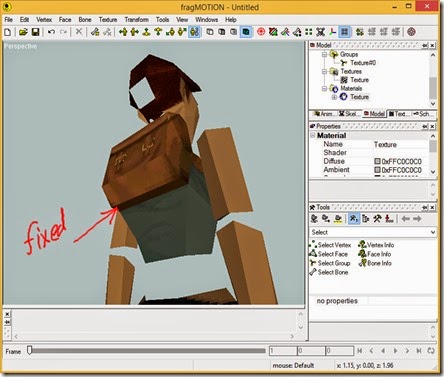
There is one fault with the model exported from Fexanim.
The upper legs are joined at one vertex so the right upper leg mesh is deformed when an animation is played.
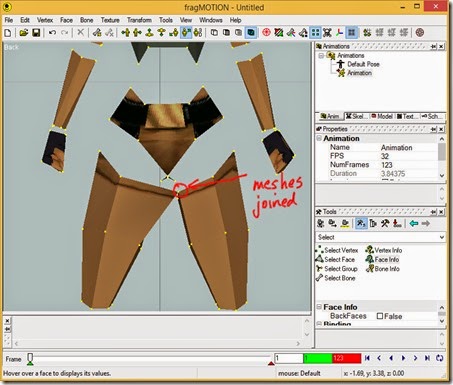
This fault doesn’t really matter if you are using fragMOTION for creating animations for TRLE since only the animations are imported into Fexanim or Daro Anim Maker.
I don’t know how to fix this in fragMOTION so if you do please explain how in a comment below.
Save your model to fragMOTION’s native *.ugh format so you don’t have to repeat these steps.
prev | next
No comments:
Post a Comment